Guide
Gamma Flip Explained: The Single Most Important Level on the Board
The gamma flip is the price where dealers switch from stabilizing the market to amplifying it. Learn to find it and why it defines the character of the day.
If you only learn one dealer-positioning concept, make it the gamma flip. It's the price level where the market's behavior fundamentally changes — from calm and mean-reverting to fast and trending. Pros obsess over it because it tells them the character of the day before they place a single trade.
What the gamma flip actually is
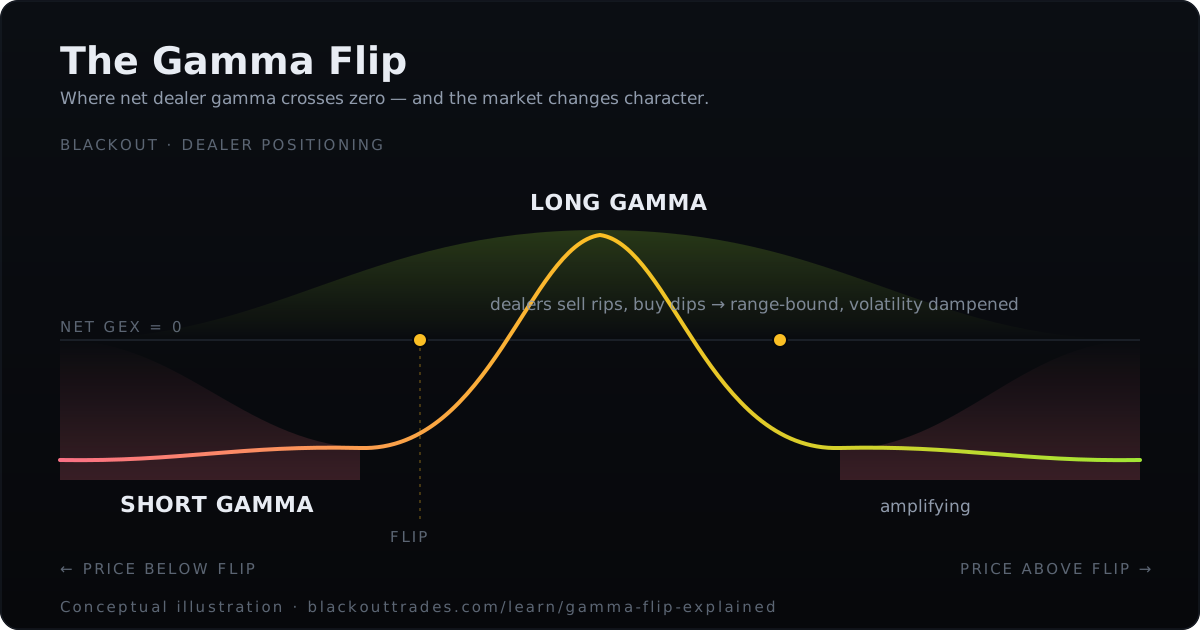
The gamma flip is the price at which aggregate dealer gamma is estimated to cross from positive to negative on BlackOut's positioning model. Above it, the model reads dealers as typically long gamma — hedging that tends to stabilize price. Below it, the model reads short gamma — hedging that tends to amplify moves. Dealer positioning is inferred from open-interest and greeks, not directly observed; treat the flip as a regime estimate, not a deterministic switch — one input into a session's regime, not the only one, since liquidity conditions, macro catalysts, and flow can all push a session away from what the flip alone would suggest. (For the underlying mechanics, see What Is Dealer Gamma Exposure?. For how the hedging process works step by step, see Delta Hedging Explained.)
Above the flip: expect chop
When price is above the flip and dealers are long gamma, they sell every rally and buy every dip to stay hedged. That hedging works against price movement, so volatility gets crushed. Days like this tend to be quiet, range-bound, and mean-reverting — good for fading extremes, punishing for chasing breakouts.
Below the flip: expect fireworks
When price falls below the flip, dealers flip short gamma. Now their hedging works with the move — they sell as price falls and buy as it rises. Small moves snowball into big ones. This is where the fast, violent selloffs and sharp reversals live. Momentum works; fading gets run over.
A concrete example
SPX opens at 5,520. The gamma flip sits at 5,490, and aggregate GEX is positive. For the first two hours the market bounces between 5,510 and 5,535 — classic long-gamma chop. Dealers sell every push toward the call wall at 5,550 and buy every dip toward 5,510. Range-bound fades work; breakout longs get chopped up.
At 1:15 PM a weak Treasury auction drops SPX through 5,490. Now dealers are short gamma. Selling begets selling: the 30-point dip in positive gamma becomes a 70-point waterfall in 45 minutes. Anyone who faded the break at 5,485 got steamrolled; anyone who recognized the regime change and respected momentum caught the trend of the day.
In this example, the flip crossing lines up cleanly with the regime change — but that's the illustration, not a guarantee. The flip is one input among several (liquidity, macro catalysts, the day's flow), and real sessions can decouple from it. The lesson is that checking which side of the flip you're on changes which playbook is more likely to work, not that it forecasts the outcome with certainty.
How to trade around it
Above the flip (positive gamma): Fade extremes, sell premium, and expect the session to stay within the call wall and put wall. Structures like the iron condor thrive here because price tends to stay in a range. Implied volatility often drifts lower as the session progresses, so premium sellers benefit from both theta and IV contraction.
Below the flip (negative gamma): Respect momentum. Directional trades work; premium-selling is riskier because the range can blow out fast. Size down, widen stops, and wait for the move to exhaust rather than fading the first push through a level.
Near the flip: This is the messiest zone — price can oscillate across the line, flipping the regime intraday. Sit on your hands or use smaller positions until the session commits to one side.
Why it changes how you trade
Same chart, same setup — but on one side of the flip you fade, and on the other you follow. Traders who ignore the flip apply the wrong playbook to the wrong regime and wonder why their strategy "stopped working." It didn't; the environment changed.
Related levels
The flip works alongside the call wall and put wall, and the whole picture is summarized by GEX. Together they define the day's structure.
See it live
BlackOut Thermal maps the gamma flip in real time every morning, so you know which regime you're trading before the open. Pair it with SPX Slayer for graded 0DTE setups that factor in the regime, or ask Largo AI to walk you through the day's flip level if you're still learning. Get access →
BlackOut provides educational tools and market analysis only and does not provide investment advice. Options trading involves substantial risk and is not suitable for every investor.
Related guides
Call Wall & Put Wall Explained: The Gamma Levels That Act Like Magnets
Call walls and put walls are where dealer gamma concentrates — often acting as magnets, resistance, and support. Learn to read them on the SPX chain.
What Is GEX (Gamma Exposure)? A Plain-English Guide
GEX, or gamma exposure, aggregates dealer hedging across the options chain to reveal where the market stabilizes or accelerates. Learn to read GEX.
What Is Dealer Gamma Exposure? A Trader's Guide to Reading the Market Like the Desks Do
Dealer gamma exposure explains why the market pins, accelerates, or reverses at key levels. Learn how to read it — and trade before the crowd moves.
Delta Hedging Explained: How Market Makers Stay Neutral
How market makers delta hedge to stay neutral, why it forces mechanical buying and selling, and how it connects to dealer gamma exposure and 0DTE moves.
Ready to trade with live dealer gamma?
See plans and open the desk — SPX Slayer from $49/mo.
View pricing →